Tuesday, April 17, 2012

Puzzle Cube

After completing Applied Statics with those 27 cubes we started to find ways that those cubes could become puzzle pieces later after finding most of the solution it would form a 3 by 3 puzzle cube.

We followed the Design Process :
ALL SOLUTIONS FOR CUBES 
  • Define Problem 
  • Brainstorm
  • Research and generate ideas
  • Identify criteria and specify constraints
  • Explore possibilities
  • Select an approach
  • Develop a design proposal
  • Make a model or prototype
  • Test and evaluate the design using specifications
  • Refine the design
  • Create or make solution
  • Communicate process and results 
Testing all possibilities 


First our main goal was to draw all the possible ways that the cubes could  be used as entire pieces to be used in the final cube. One constraint was that it had to be 3 by 3 and it could not be more that that and the could only be 6 maximum and 3 minimum cubes on the piece.
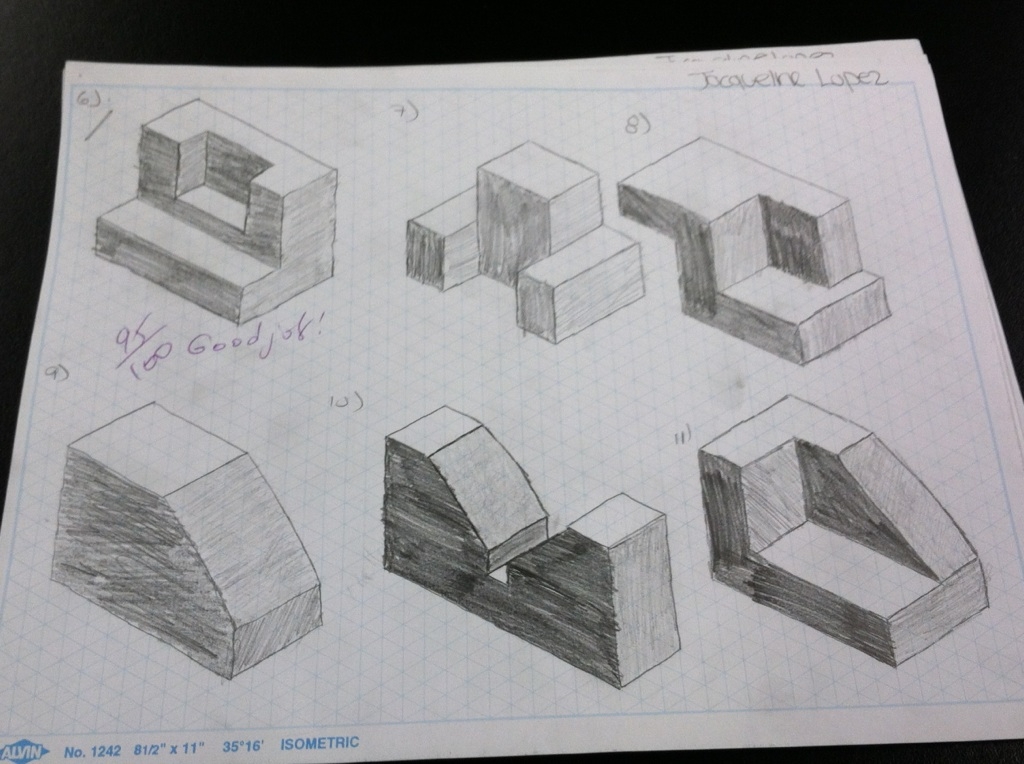
After finding all the solutions we had to pick 5 solutions so that they could fit to be a 3 by 3 cube and no piece could be repeated they all had to be different. With plastic cubes that were able to attach to each other we tried many ways. 
When we finally found a solution that was okay with all the constraints we sketched it down on isometric paper.

My Solution consisted of one piece with 3 cubes the next with 5 cubes and the other 3 having 6 cubes in them. 


When the Final solution for the cube was found I had to make it with my real wooden cubes and glue them together and paint all the five pieces all different colors. And put them together to make the cube. We also answered questions and wrote in our journals all the steps we had taken to complete the cube and packaging.

After the cube was all done packaging had to be made we came up with a name for the puzzle cube a logo and a price. Then made the packaging with what ever design we made up and made something that would grab the buyers attention.

Finally the entire project was done and the puzzle cube and its packaging was done and handed in.


Applied Statistics

Applied Statistics


This assignment was all about measuring 27 cubes. And finding the different measurements . Our measuring tool was a dialer calliper it measured 3/4" of an inch. Once all the measuremnts were gathered it was a data set. Then we found the number that reprentsented the mean the median, range and mode of the set.


The mean is the calculation of all the measurments added up and then divided by the toatl number if items.
Mean- 20.31in./ 27= 0.7518in.


The median the number in the middle number i found it by creating a steam and leaf plot.
Median- 0.752 in.


The range is the maximum subtratced by the minumum.
Range- .760in.- .741in.= 0.019in.


The mode is the number that appears the most in the data set.
Mode- .754in.


After all the dated was collected we made a graph showing the results of the data set.After this we concluded the assignment with answering conclusion questions.
GRAPH
CONCLUSION QUESTIONS


Tuesday, January 24, 2012

Sketching Techniques

Isometric

Isometric

For this project we worked on many different types of sketches. We also worked on our tonal shading because with light there is different shading steps. You can shade things very lightly or very dark to represent the light hitting the object. the different types of sketchs we learned are Oblique,Isometric, and Perspective.


Oblique


Perspective


Friday, January 20, 2012

History Of Measurement

For this project we had to research various facts about Measurements. During this project we learned alot about how measurements came to be. I believe this will help us understand engenieering better.


My partners and I came up with this cover. We wanted it to be something different and creative that all of us liked.


In the back of the CD cover we placed all of the questions so that then we could answer them in our power-point presentation.We also created a power point presentation including all the answers and the questions on the back of the CD cover. Like shown below.